So I've seen these resin flowers all over Etsy and at Boutiques and I just LOVE them. They are so simple and beautiful. I realized, "Hey, I could make those!" and with a little encouragement from my husband, I did.
They are a little tricky though and there is surprisingly not a lot of help on the internet so I've had to figure it out myself. I think most sellers on Etsy don't want to give away how to do them, but I will share with you all the best way that I figured out.
If you just want to buy a pair, click over at my
Etsy shop on the side bar and you can just buy some from me.
 Here is what you will need:
Epoxy Resin- (I used
Amazing Casting Resin)
pigments or resin dyes (make sure they are made for resins or your resin will not cure properly)
measuring cups
stir sticks (popsicle sticks work great)
wooden toothpicks
silicone molds (I like the ones from
moldmuse on Etsy)
parchment paper
a microwave
gloves
Baby powder or Talc
small paintbrush
This resin is a two-part resin, that you mix in a 1:1 ratio and then cures rather quickly. Once you mix the two parts you only have a minute before it will start to harden so preparation is key.
When I first started making the flowers they all came out flawed like this:
Air bubbles would get trapped in the mold and ruin the flowers. To prevent this from happening, you first have to prep the mold by coating it with baby powder. I'm not sure why it works, but it does.
Pour some baby powder onto your molds and use a small paintbrush to get it in all the little crevices.
When you bend it, you will see all the baby powder clumps, but we need to get those out so that they resin can flow into those areas of the mold. Blow directly on the mold as you bend it (be careful not to inhale or you will get a breath full of baby powder) to blow off the clumps, but still leave a very thin layer of baby powder. It should look like this when you are done:
Once again, before blowing on it:
After:
Now the molds are prepped and onto the resin:
The resin comes in plastic bottles with foil seals. To make pouring easier and less messy, don't remove the seals, just poke two small holes in it. One to let liquid out, one to let air in, like this:
Wear gloves, you don't want the resin coming into contact with your skin. Using the measuring cups that come with resin kit, first measure out the "B" part. This side does not pour very well, so I just eyeball an amount. Then I see how much I poured and pour the same exact volume of the "A" part in a SEPARATE measuring cup.
If you are going to add color, now is the time to do so, otherwise your resin will just be white. Add the pigments to the "A" side only and be sure to mix very well, but do not stir too vigorously. Bubbles are our enemies. A little pigment goes a long way. A drop is more than enough. This is the fun part though, experiment with different combos to make different colors. For this example I used a drop of red and small amount of yellow. I use a toothpick to add the color that I want.
Mix very well. If it is not mixed well, any color swirls will not cure properly and your finished product will come out sticky.
Now for some science. The resin needs heat to cure, which is normally not a problem because the reaction between the two solution parts is exothermic which means it creates heat. The problem is that when you are using small molds with lots of intricate details, the amount of heat generated is not enough for the resin to cure properly or quick enough. So, you MUST HEAT UP THE MOLDS. To do this, place the molds on some parchment paper and heat them on high for one minute in the microwave. As soon as they come out of the microwave, just move the whole parchment paper over to where you are mixing the resin. Double-check that you have everything ready and a stir stick and toothpicks within reach.
Now pour the two parts into a separate container to mix. I usually use a small disposable paper cup, but I used another measuring cup for this tutorial so you can see the liquid.
NOW IS WHERE YOU MUST BE FAST.
Once the two parts are mixed, you only have a minute before it starts to harden.
Stir the two parts together well, once again being careful to not introduce any bubbles.
You want to mix for about 30 seconds. As you stir you can see the two parts swirling together. You know that you have mixed them for long enough when you no longer see these swirls. Be careful though, if you take too long, it will start to cure and you won't have time to pour them.
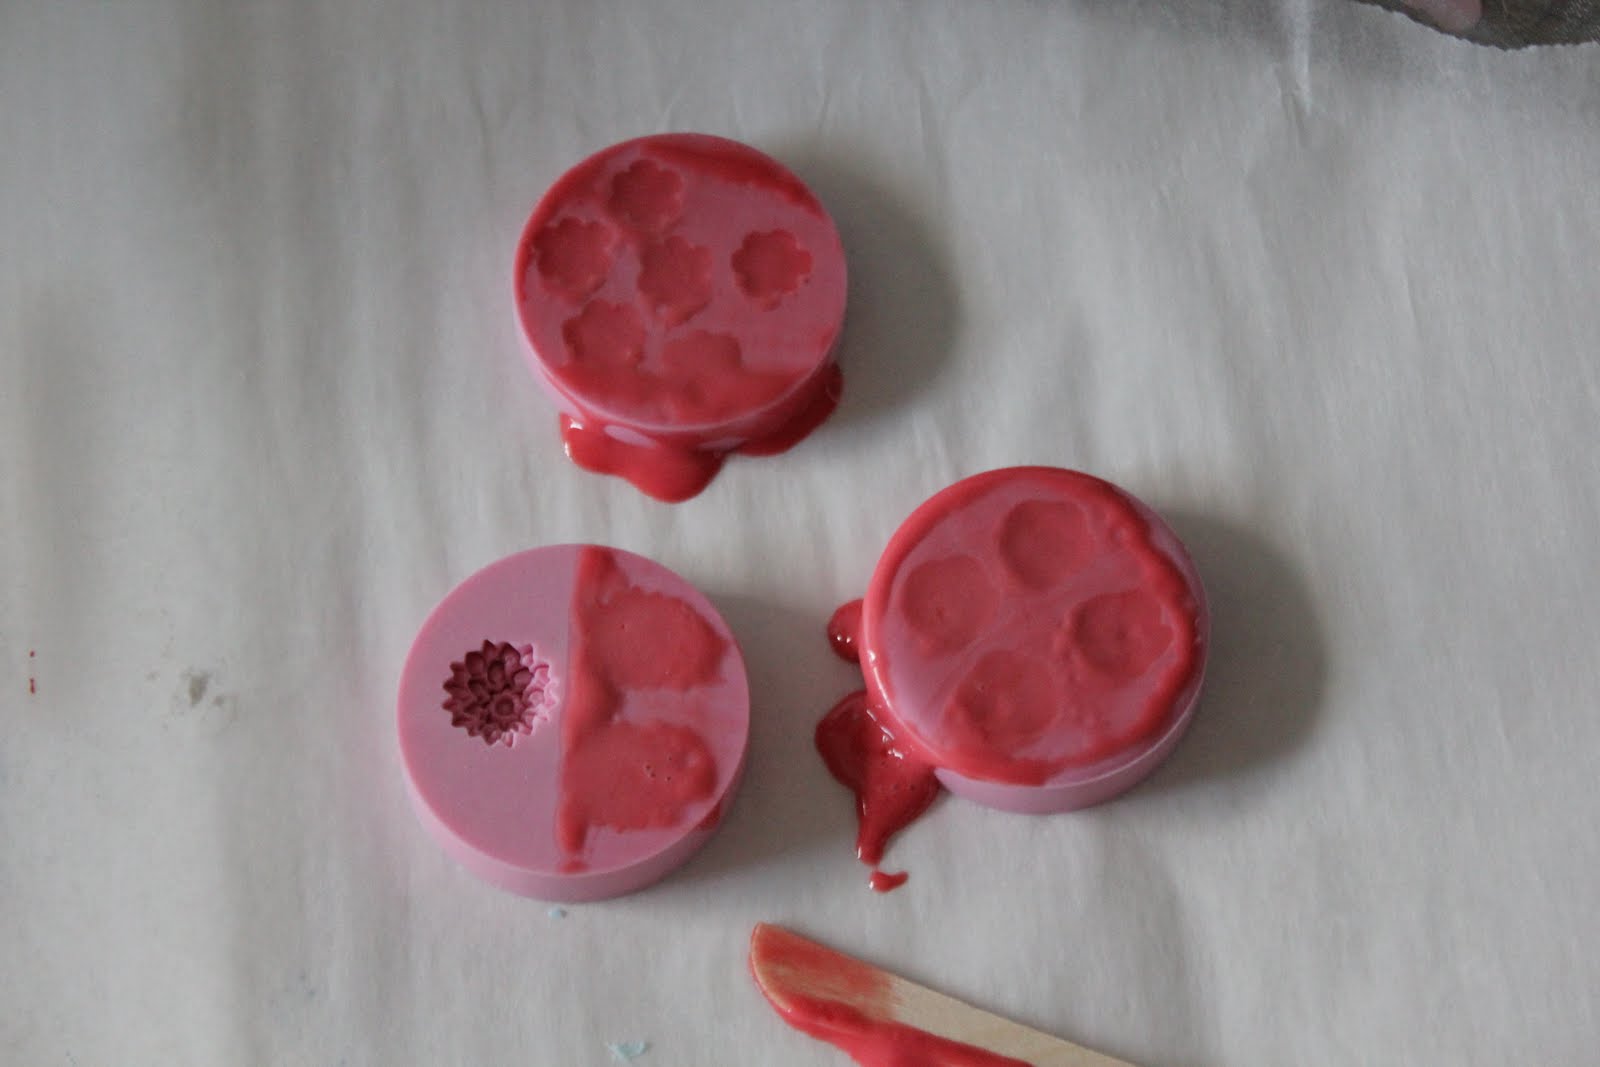
Carefully and quickly, pour the resin into the molds. It has a tendency to run down the side of the cup so watch out for that.
I made a mess of these molds, but that is okay.
You can use the flat edge of the stir stick to wipe off any excess resin.
On this one, I didn't quite have enough, so I wiped the excess onto the other mold.
Another trick that I learned, use a toothpick to quickly poke at all the really small details in the molds. This helps to release any air that may be trapped in them and pushes the resin into those small openings.
Try to make the molds as flat as you can, but don't worry about it too much. You can always sand them flat once they have hardened.
Now you wait for them to harden. You must wait 5-10 minutes before you can remove them from the mold.
When it cures, the resin will change from clear to opaque. It is kind of fun to watch.
After 10 minutes or so, you can remove them from the molds.
The resin is hard, but still pliable enough to where you can rip as much of the excess off as you can.
Let them sit out for a bit longer to fully harden.