Tuesday, October 15, 2013

Jake the Neverland Pirate Costume


My son has been obsessed with Jake and Neverland Pirates ever since they made it available on Netflix. Up until a few weeks ago, he wanted to be a dragon for Halloween, which I was not looking forward to making, so I was really happy when he changed his mind and wanted to be Jake instead.


This Jake the Neverland Pirate is so easy to make...


and by using felt, it is pretty cheap too!


My son likes this costume so much, that I can see it getting a lot of dress up play time as well.


If you want to know I how I made it, you can view the full vest and shirt tutorial here and the boot and belt tutorial here.


With my tutorials, a red bandana, some blue pants and a cardboard sword, your little guy could have a full Jake costume on the cheap as well.


Jake and the Neverland Pirate Felt Boots and Belt Tutorial


 Pirate boots are such an integral part of a Pirate costume that I really wanted my son to have some boots, but I was not willing out to shell out the cash to actually buy some boots. I came up the idea to make him some boots out of felt that would just attach over his shoes and pants. They may not be as great as the real thing, but I think they look pretty darn good especially considering how much cheaper they are.

They have a strip of elastic on the bottom that slips around the bottom of the shoes...

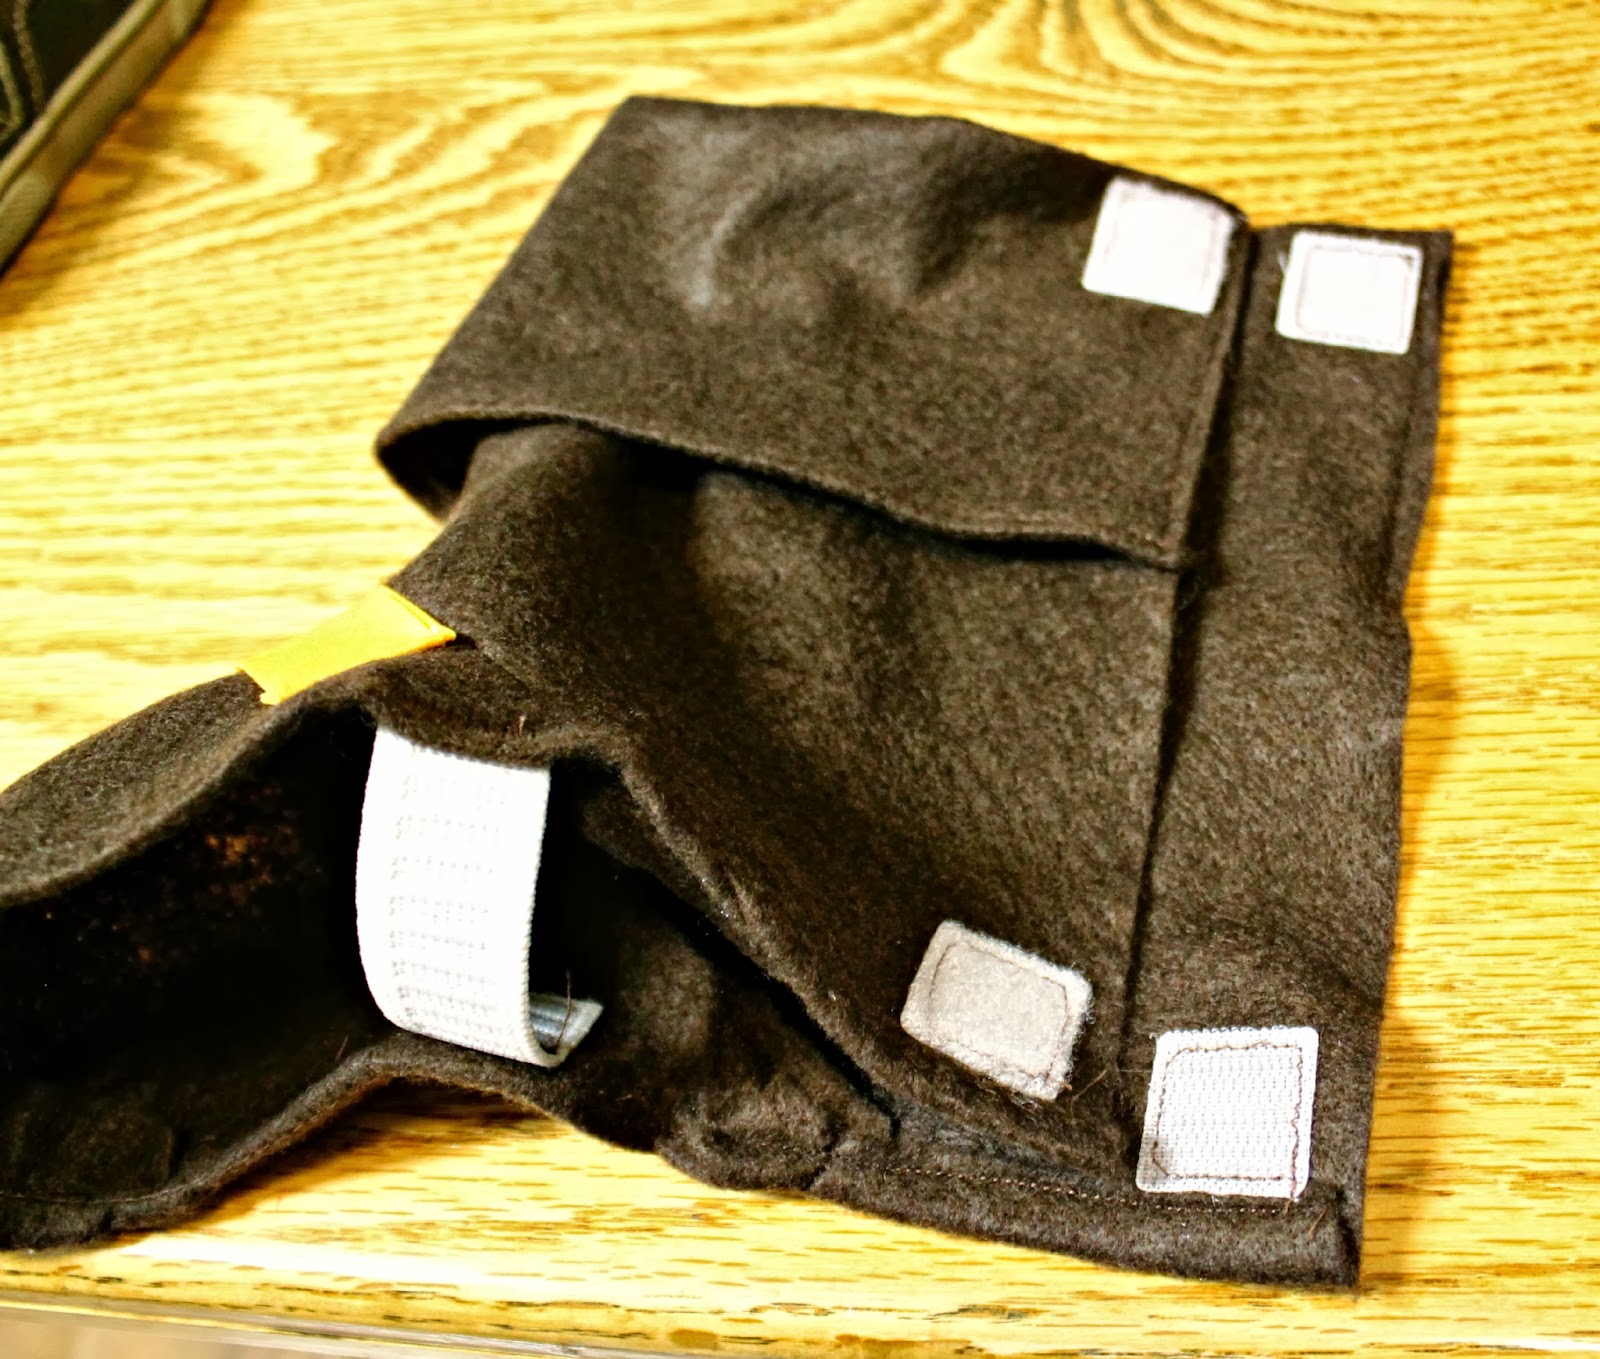
And they velcro in the back around the legs and back of the shoe.


Here is how to make them.

Felt Boot Shoe Cover Tutorial
To see the vest and shirt tutorial click here
To see the belt tutorial-scroll down

Materials:
Pattern Pieces (Click to download)

Brown Felt (about 1/2 yrd of 72" width)
Velcro (about 6 1"squares)
Bias tape (about 10" of 7/8" wide double quilt binding leftover from vest)
Elastic (2 4" pieces of 5/8" non-roll elastic)
Thread

Download and print off the pattern piece and measure and cut the two 12"x11.5" rectangles with 6 7/8" wide by 1.5" high half circles cut out as shown on the pattern piece. Cut 2 of the top of shoe part (the pattern piece) out of felt as well.

For the purposes of this tutorial, I am only showing one shoe, but you will do the same for both.


Place the shoe top on top of the rectangle piece and line up the curved edges. Pin and sew together.

It should look like this when sewn.

Using a basting stitch, sew about 5/8 inch from the edge along the upper curved edge.
 Pin the back around the shoe that will be worn with the "boots" and then pull on the basting threads to gather the curved edge along the bottom edge of the shoe.

Fold the raw under and pin in place. Remove the shoe and safety pin and then sew gathers in place using a normal stitch length. 


It should look something like this.


Try it on the shoe again, and if it is like mine, it is still a little loose.


I flipped it over so the sole of the shoe was down, then pulled the excess to make two pleats on the front.


Pin and sew in place along previous stitch line, it should look little like this.


On the top edge of the boot, Fold over about 1/4" and sew down as shown.


Fold this edge down again, about 3 1/2" and sew down the side (not along the whole bottom edge)

 Just down the 3 1/2 inches that you folded on both sides.

 On the bottom of the "boot" sew in the elastic (you may want to put the shoe in again to make sure that you make it tight enough) using a zig zag stitch and go back and forth a few times to reinforce it.


 Using leftover bias tape from the vest. sew a strip about 5 inches long with the edge folded under over the top of the boot to make it look like a gold strap or buckle.

Finally, add velcro to back so it can be strapped around the foot and leg. Originally I only had two pieces of velcro as shown, but after trying it on my son, I noticed the middle pulled apart too much, so I added another piece of velcro to the middle.


And your done! 


To make the belt, take a piece of black felt about 8 inches wide and 26" wide (measure your son's waist and add 3-4 inches). Fold it in half and sew along the long side. Turn out and then sew up the back sides (I just sewed the raw edges shut without folding them under, but you can fold them under if you desire) Add a couple pieces of velcro and then you are done! For mine, I added a strip of velcro on one side so I can fit him as he grows and fit friends if they want to wear it too.

You put it all together with fun cardboard sword and red bandana and you've got a very cute, fun, affordable costume! 


Jake the Neverland Pirate Shirt and Vest Tutorial


Ever since Disney's Jake and the Neverland Pirates was made available on Netflix, my son has been obsessed. A month ago, I asked him what he wanted to be for Halloween and he said a dragon. I was not excited about that costume. We have been really busy lately and that just seemed like such huge costume project. I was so happy when he changed his mind and wanted to be Jake instead.


 Jake is such a fun and EASY costume to make. I could have completed all of it in just one day, except I only had a few hours here and there that I worked on it. This pattern and tutorial is for a size 4T, but it could probably fit a 3-5 year old. If you want to make it bigger, just add more length and width to the vest pieces.


 Jake the Neverland Pirate Shirt and Vest Tutorial
To view the tutorial on how to make the boots and belt click here

Materials:
Vest Pattern Pieces (click link to view and print pdf)
plain white T-shirt
leather/suede cording
scissors
1 yard of 72" wide blue felt
golden colored bias tape (I used .875 inch double fold quilt binding in Marigold)
golden yellow adhesive felt circles (or just felt and glue)
thread
needle
sewing machine


Start by taking your T-shirt and cutting off the collar, sleeve hems, and bottom hems to give them a raw edge. It is a jersey knit so it won't fray.

 Cut slits in the sleeves,
 and a large slit in the middle of the collar. Also cut 4 tiny holes along the collar slit for the leather cording.

 Finally use sueded cording to lace an "X" into the front. I double knotted the cord on the reverse side. I did this so when I go to wash it, I can just take out the cording so it doesn't get ruined in the wash.
And that is it for the shirt! So easy!

Now for the vest:

Click on the Pattern Pieces link and print off the pattern. Then cut them out, line up the dots on the front and back vest pieces and tape them together. This pattern is for a size 4T. It fits my big 3 year old and can probably fit up to a small 5 year old.

Lay the pattern pieces on the folded up piece of blue felt, with the back and back collar pieces on the fold as indicated.


 Cut out the felt.


Place the right sides together of the front and back vest pieces and sew along top of shoulders and down the side on both sides (1/2" seam). Do not sew up the arm hole.


 Place the right sides together for the Collar pieces and sewn along top shoulders.


  Pin RIGHT side of collar to the WRONG side of the vest as shown, then sew together.


It feels wrong when you do it, but when you are done and you flip everything out to the right side, it should look like this:


Even out any of the seams that don't line up just right by trimming off a little of the felt. I made up this pattern pretty quickly so the collar pieces don't line up just right, but that is an easy fix. 


Now to add the bias tape trim. Open up the bias tape and sandwich the edge of the vest (I start on the bottom in the back where the seam is less obvious) and sew on about 1/8" from the edge. The corners can be a little tricky, but I mitered them the same way you would miter the corners on a quilt binding. 


The inside corner was tricky too, I had to fold it under a bit and it still looks a little funky, but it works.


When you get back to where you began, fold under the edge and then sew it closed. 


For the buttons I used felt adhesive circles that I use for the underside of headbands, but if you don't have these, you can just cut some circles out of felt and glue or sew them on. You can also add real buttons, but I was trying to keep the cost and difficulty down. 


Because felt doesn't iron real well, I tacked down the front of the collar in 2 spots so that it stays down and look better.


Then you are all finished! I have another tutorial coming soon on how to make the belt and boots