Tuesday, August 16, 2011

Crochet Bow Hair Clip Pattern

I love how popular bows are becoming again. This crochet pattern I use for Hair Clips for my daughter, but it could easily be made into something for yourself too. I wore one on a headband once, but I felt a little silly. I am just not trendy enough for it and didn't think I could I pull it off. I'm sure I looked just fine, but I was self-conscious  about it the whole time. Maybe I will try again later when I am in more of a trendy mood :)


This pattern is put together just like the Little Guy Bow Tie so go to that post for specific instructions on how to put it together.

I also made an improvement to the Little Guy Bow Tie so be sure to check that out to. I added velcro to the elastic to make it easier to get on and off without having to pull it over their heads.

Bow Hair Clip Crochet Pattern
by Ris C

Materials:
Worsted Weight Yarn
Size H Crochet Hook
Yarn needle
Alligator clip or barrette
Ribbon (optional)
Hot Glue and Glue Gun

Bow:
Round 1: ch 6, hdc across (start in 2nd ch from hook): 5 hdc
Round 2-18: ch 1*, turn hdc across: 5 hdc
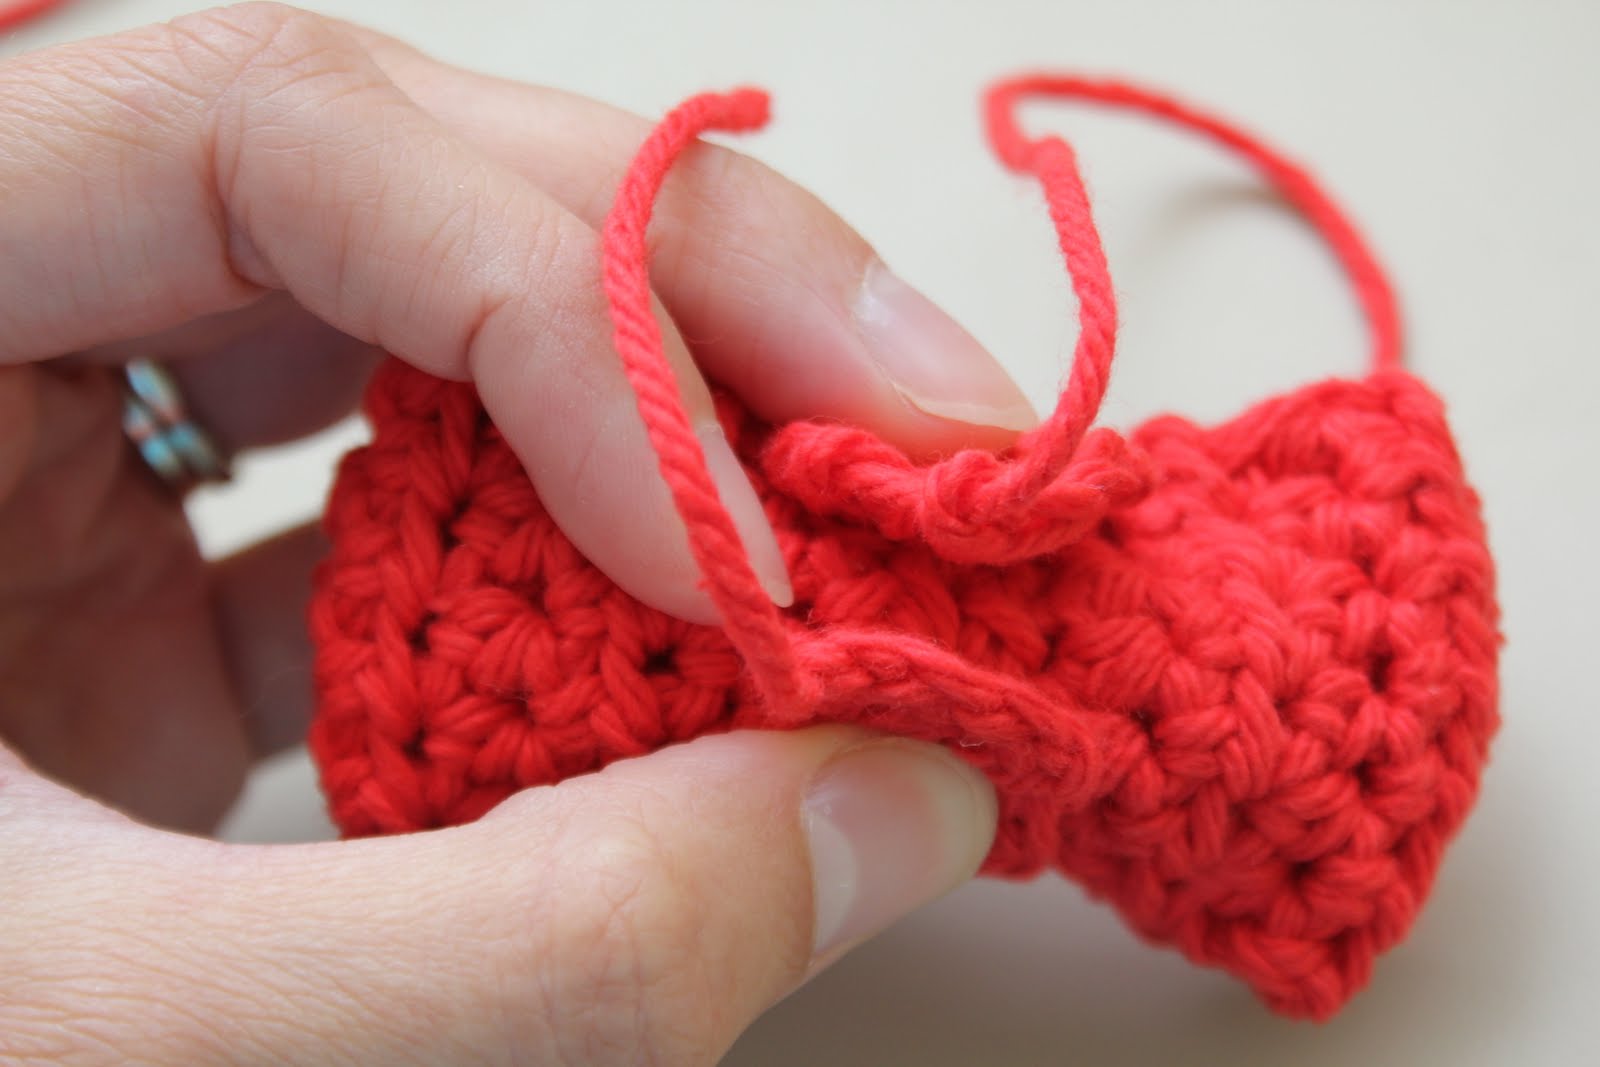
Sew round 1 to round 18 to form a cuff and then pinch center, sew through, wrap yarn around and knot to keep pinch in place.

Center:
Round 1: ch 4, hdc across (start in 2nd ch from hook): 3 hdc
Round 2-6: ch 1*, turn, hdc across: 3hdc
Wrap around center of bow and sew in back to form the center.

Glue ribbon onto alligator clip (optional) and then glue clip (or barrette) to back of bow.

*Technically you are supposed to chain 2 for a hdc, but for me, 1 chain seems to look better. Just do whatever works best for you. It all depends on how tight or loose your stitches are.


I have several colors of these bows listed in my shop if you would rather just buy them then make them :)

Shared on:
Creations by Kara


Monday, August 15, 2011

In Total Disbelief!!!

I still cannot believe it, but I actually won Dana's design her header contest. Check it out here. My design will be her header for the next 2 weeks, so please check it out.

There were so many great entries. I was going to go through and show a few of my favorites, but I could not narrow it down to just a few. Head on over to http://www.dana-made-it.com/ to view her favorites and browse through the flickr group to check out them all.

I do need to give credit to my husband for helping me out. He is the photoshop pro (well, more than me) and he is the one who showed me how to use the magic wand tool to "cut" the skirts out. He also helped me choose which skirts to use. We had a lot of fun!

Friday, August 12, 2011

Pesto Butter

 Tonight I have a church activity and I signed up to bring homemade sourdough bread. It needed something to go with it though so I came up with this Pesto butter and oh boy did it turn out good. It is very flavorful so a little goes a long way.

Pesto Butter

Ingredients:
1 cube of butter, softened
1/4-1/2 cup of fresh basil leaves
3 cloves of minced garlic
1/2 T Olive Oil
1/2 cup of grated Parmesan cheese
salt and pepper to taste

Mix everything up in a food processor or blender (I used a stick blender) scraping sides periodically so that the basil leaves all get pureed pretty well and everything is smooth. If it is too thick, add a little more olive oil until you get the right consistency. Serve with your favorite crusty bread. Refrigerate any leftovers.

This is very forgiving so add more or less of any of the ingredients to get it to your liking. My husband said that he would like it better with a little more garlic, but I think it had plenty. 


Part of me wants to just keep it home and not share it :)

Shared on:


Thursday, August 11, 2011

MADE Header contest


Dana from MADE recently held a contest to design her header and she liked one of mine! There were over 300 entries and yesterday and today she has been showing her 35 favorites. I am so flattered that she actually featured one of mine. Here was my entry:

If you have never checked out her blog, you should. She is so creative and all of her pictures are beautiful.

And welcome any readers that are visiting from MADE!

Sunday, August 7, 2011

Crocheted Little Guy Bow Tie

***Updated on 8/16/2011 Scroll down for improvement***

Today I am doing a guest post over at Belle's Bazaar so if you are coming over from that blog, Welcome! Heather is one of my first roommates from college and is out of town this week so she asked me to do a guest post while she is gone so go check it out. She is a talented lady so be sure to check her other posts while you're there.

I feel like I am always making stuff for my daughter so this time I made something for my little boy. I love bow ties on little boys and this crocheted one is so cute and easy. Anyone with basic crochet skills can do it and I will show you how. For those that can follow patterns, I will put the pattern first. I will then have step-by-step photos for those that need it.

Little Guy Bow Tie Crochet Pattern
by Ris C

Materials:
Worsted Weight Yarn
Size H Crochet Hook
Yarn needle
1/4" elastic and fabric-tac (or some other way of putting bow tie around your little guy's neck.) 

Bow:
Round 1: ch 7, hdc across (start in 2nd ch from hook): 6 hdc
Round 2-20: ch 1*, turn hdc across: 6 hdc
Sew round 1 to round 20 to form a cuff and then pinch center, sew through, wrap yarn around and knot to keep pinch in place.

Center:
Round 1: ch 4, hdc across (start in 2nd ch from hook): 3 hdc
Round 2-9: ch 1*, turn, hdc across: 3hdc
Wrap around center of bow and sew in back to form the center.

Lace a 12" or so (measure neck) piece of 1/4" elastic through back of the center piece and glue ends together with fabric-tac. If you do not have fabric-tac, use a sewing machine to zigzag back and forth a few times to secure the ends together.

***Improvement***
Alternatively, you can attach velcro to both ends of the elastic so that it does not need to be slipped over his head and to make it easier to get on and off.

*Technically you are supposed to chain 2 for a hdc, but for me, 1 chain seems to look better. Just do whatever works best for you. It all depends on how tight or loose your stitches are.


So those that need a little help:

Chain 7 to start and then in the 2nd chain from the hook, make your first half-double crochet (hdc)

Then hdc all the way across the row so you have 6 hdc and then ch 1 on the end of that. This is your turn.

 So now you can flip it over and hdc across the next row. Do this until you have completed 20 rows.

When your done, you'll have a 6x20 stitch rectangle. Leave a long tail and pull it through so your stitches won't come undone. Then make the center in the same way except only 3x9 stitches.


Fold it over so the short ends come together to form a cuff. Using a yarn needle, sew the edges together.
 It doesn't have to be pretty because it will be in the back and will be covered up by the center piece.
 Then with the same tail of yarn, from the back and pull needle through about 1/4 of the way from the edge.
 Then turn it around and go through front 1/4 of the way from on the other edge.

It will look this on the front before you pull it tight.

 Then pull it tight so that it cinches the center.

Wrap the tail around the front to keep it in place a little better and then tie it in a knot with the tail of yarn from the start.

Front view:

 Back view:

Take the center piece and wrap it around the front:

Bring the ends together in the back and sew them together like you did the ends of the bow. 

Finished bow from the front:

Measure the neck of your little guy (with a collared shirt on to be more accurate) and cut a piece of 1/4" elastic a little bit smaller than that. (Just be sure it will stretch enough to fit over his head). Lace through the center piece in the back of the bow.

Place a dab of fabric-tac on the end and then glue the other end to it.

Hold it in place for 10-15 seconds or so until it will stay in place on its own. 

***Alternatively, you can attach velcro to both ends of the elastic instead of gluing them (just glue the velcro to the elastic with the fabric tac) and then it is easier to get the bow tie on and off your little guy and you don't have to slip it over his head.


 Now you have a bow tie for your little guy that you can just slip over his head and tuck the elastic under his collar.
I had so much fun with these that I had to make a few in different colors.
 I make smaller bows on hair clips for my little girl too. I will have to post that pattern soon too.***Little girl Hair bow pattern is now posted here.

 
 I just love how cute my little guy is in it!

Shared on:


Creations by Kara


Craft Junkie Too Friend

Thursday, August 4, 2011

Three Sisters Garden Update

Remember when everything in our garden was tiny and just barely starting to grow? Well look at it now! Whew, those sunflowers have been growing like crazy. At one point it felt like they were growing 6 inches a day. The flower heads are just beginning to form so I think they will stop getting higher now.

They have served their purpose though. Although the green beans we planted did not grow very well (out of the 16 we planted, only 3 grew). The ones that did have laced themselves around the sunflowers and climbed on up. Can you see this one wrapping itself around? That's like 5 feet high too. Their good little climbers.
 
 We even have some corn growing. I think we had about 4 stalks shoot up so we did not think that we get any corn because corn needs to be planted in bunches so it can cross pollinate. Everything we read recommended that you grow at least 12 stalks so that they can cross pollinate. I guess we were just lucky!
The only thing I will probably do different next year is wait longer to plant the squash. Once it started growing well, the leaves blocked the still small beans from getting enough sunlight. We ended up having to cut off a bunch of the leaves from the squash. Each large leaf usually supports a flower which will grow into a squash. It was sad to see the flowers die and know we weren't going to get squash from them. We do have plenty more flowers forming though so I am sure we will get plenty.


Oh yeah, remember those tiny herbs just beginning to sprout? Well look at them now:
 I've been trying to use the basil as much as I can, but I guess not enough because this one is going to flower.

Wednesday, August 3, 2011

New Toy

I found a sale online where I could get a customized self-inking stamp for only $7, spend $10 and shipping was free, so I got some extra ink too. I love it! I used to use return address labels that would always get stuck in our printer or not feed right so the labels didn't line up right. They were such a pain and about $10 for a pack. For the same price I got a self-inking stamp and refill ink. I think they make my earring cards look so much more professional. What do you think?