***Updated on 8/16/2011 Scroll down for improvement***
Today I am doing a guest post over at Belle's Bazaar so if you are coming over from that blog, Welcome! Heather is one of my first roommates from college and is out of town this week so she asked me to do a guest post while she is gone so go check it out. She is a talented lady so be sure to check her other posts while you're there.

I feel like I am always making stuff for my daughter so this time I made something for my little boy. I love bow ties on little boys and this crocheted one is so cute and easy. Anyone with basic crochet skills can do it and I will show you how. For those that can follow patterns, I will put the pattern first. I will then have step-by-step photos for those that need it.

by Ris C
Materials:
Worsted Weight Yarn
Size H Crochet Hook
Yarn needle
1/4" elastic and fabric-tac (or some other way of putting bow tie around your little guy's neck.)
Bow:
Round 1: ch 7, hdc across (start in 2nd ch from hook): 6 hdc
Round 2-20: ch 1*, turn hdc across: 6 hdc
Sew round 1 to round 20 to form a cuff and then pinch center, sew through, wrap yarn around and knot to keep pinch in place.
Center:
Round 1: ch 4, hdc across (start in 2nd ch from hook): 3 hdc
Round 2-9: ch 1*, turn, hdc across: 3hdc
Wrap around center of bow and sew in back to form the center.
Lace a 12" or so (measure neck) piece of 1/4" elastic through back of the center piece and glue ends together with fabric-tac. If you do not have fabric-tac, use a sewing machine to zigzag back and forth a few times to secure the ends together.
***Improvement***
Alternatively, you can attach velcro to both ends of the elastic so that it does not need to be slipped over his head and to make it easier to get on and off.

*Technically you are supposed to chain 2 for a hdc, but for me, 1 chain seems to look better. Just do whatever works best for you. It all depends on how tight or loose your stitches are.

So those that need a little help:
Chain 7 to start and then in the 2nd chain from the hook, make your first half-double crochet (hdc)

Then hdc all the way across the row so you have 6 hdc and then ch 1 on the end of that. This is your turn.

So now you can flip it over and hdc across the next row. Do this until you have completed 20 rows.

When your done, you'll have a 6x20 stitch rectangle. Leave a long tail and pull it through so your stitches won't come undone. Then make the center in the same way except only 3x9 stitches.

Fold it over so the short ends come together to form a cuff. Using a yarn needle, sew the edges together.


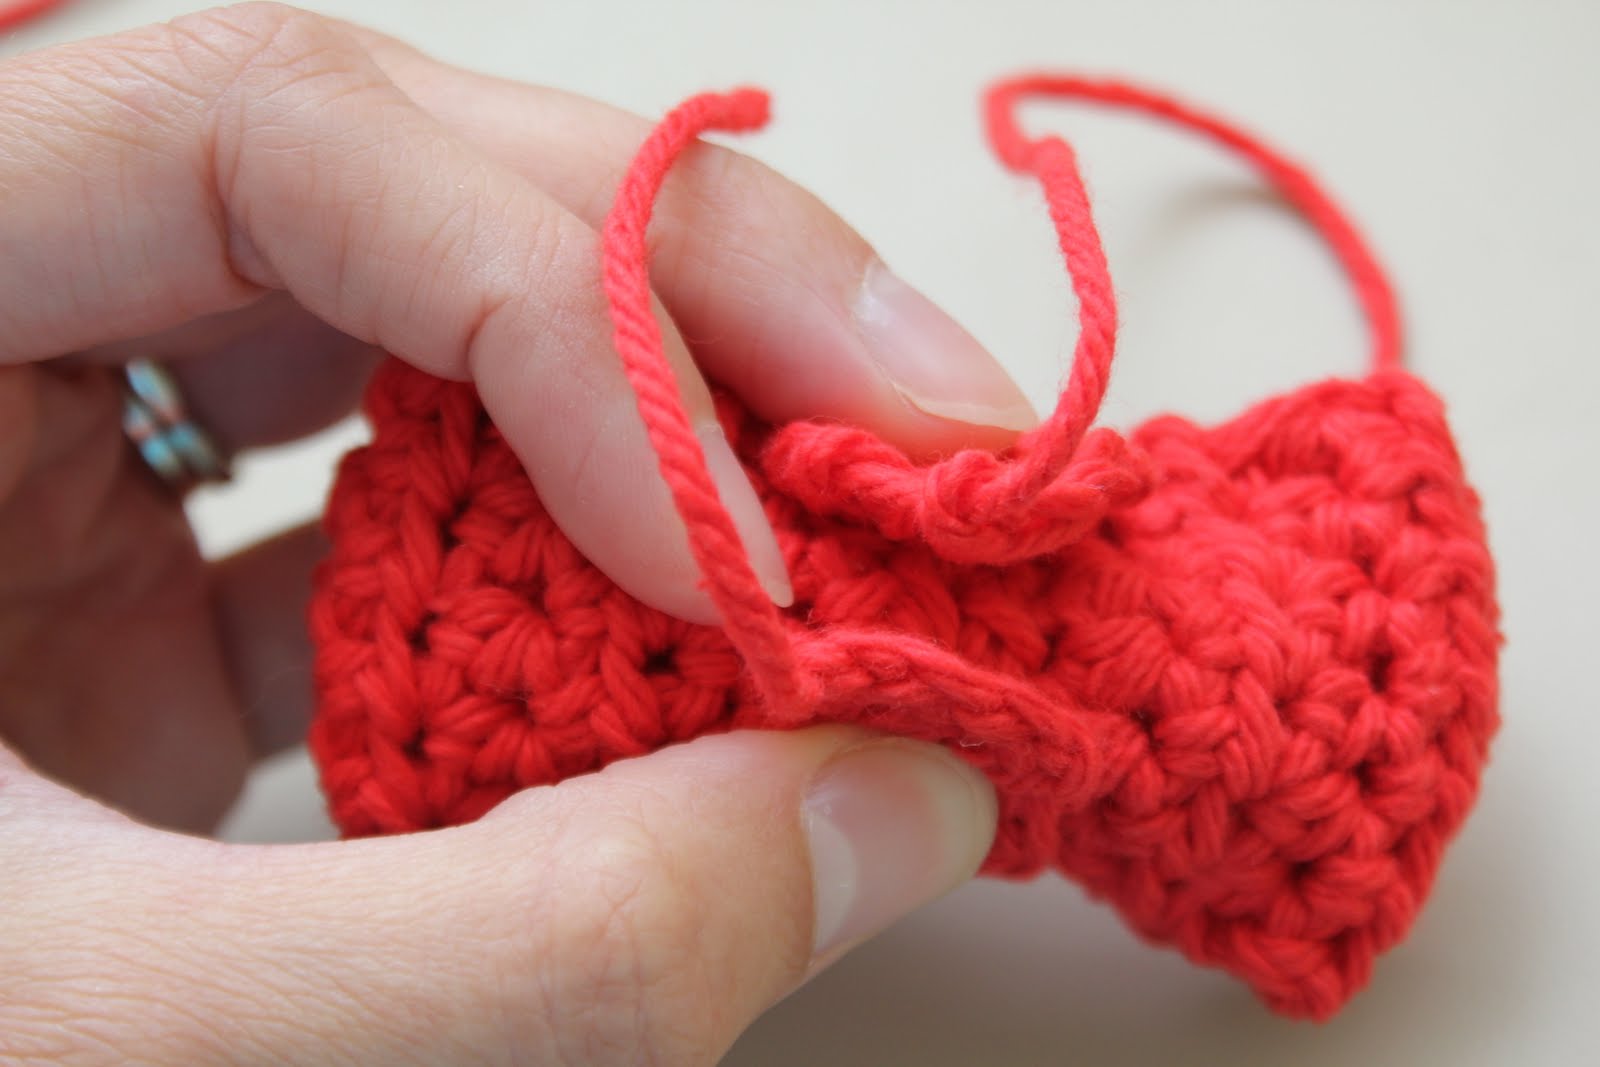
Then turn it around and go through front 1/4 of the way from on the other edge.

It will look this on the front before you pull it tight.

Then pull it tight so that it cinches the center.

Wrap the tail around the front to keep it in place a little better and then tie it in a knot with the tail of yarn from the start.

Front view:

Back view:

Take the center piece and wrap it around the front:

Bring the ends together in the back and sew them together like you did the ends of the bow.
Finished bow from the front:

Measure the neck of your little guy (with a collared shirt on to be more accurate) and cut a piece of 1/4" elastic a little bit smaller than that. (Just be sure it will stretch enough to fit over his head). Lace through the center piece in the back of the bow.

Place a dab of fabric-tac on the end and then glue the other end to it.

Hold it in place for 10-15 seconds or so until it will stay in place on its own.

***Alternatively, you can attach velcro to both ends of the elastic instead of gluing them (just glue the velcro to the elastic with the fabric tac) and then it is easier to get the bow tie on and off your little guy and you don't have to slip it over his head.

Now you have a bow tie for your little guy that you can just slip over his head and tuck the elastic under his collar.

I had so much fun with these that I had to make a few in different colors.


I just love how cute my little guy is in it!
Shared on:

Creations by Kara


Oh my goodness, I just found you through Heather and this little bowtie is too too cute! I can't wait to make it and try it out on a photoshoot! I bet it would photograph beautifully! Thanks for the pattern!
ReplyDeleteNotes She Wrote
This little guy is just so stinking CUTE!!!!!I am just so in love with him.
ReplyDeleteVery cute - the boy and the bowtie :)
ReplyDeleteOh so adorable! Do you sell these on etsy?
ReplyDeleteOk, just bought some really cute stuff from your store. Found you on Skip to My Lou! Love your stuff! Thanks!
ReplyDelete